")
Struggling to figure out how to assemble that new bike that just arrived in a box? Don’t sweat it – with this step-by-step DIY guide, you’ll have your new wheels up and running smoothly in no time.
In this DIY bike assembly guide, you’ll learn:
- How to set up an organized workspace and gather the required tools
- Steps for unpacking and inspecting components
- Installing the wheels, drivetrain, brakes, and other parts
- Important tips to check bolts, test ride, and troubleshoot common issues
Follow our 8-step guide on how to assemble a bike. (including mountain bikes) With the help of these instructions, you’ll go from a box of parts to a fully functional and tuned bicycle. Let’s get started.
Cyclify India is reader-supported! We may receive an associate commission if you make a purchase through one of the Amazon Associate links on this page! Continue Reading…
Table of Contents
STEP- 1: Preparation
Before starting to assemble a bike from scratch process, it is important to set up an organized workspace and gather the necessary tools. This preparation will ensure the process goes smoothly and safely.
Choose a Clean, Uncluttered Workspace
Pick a large, flat area for assembling the bike, such as a garage floor or driveway. Sweeping the floor first will prevent dirt from getting on bike parts. Have a table nearby to organize small parts and tools. Ensure there is adequate lighting so all bike components are visible.
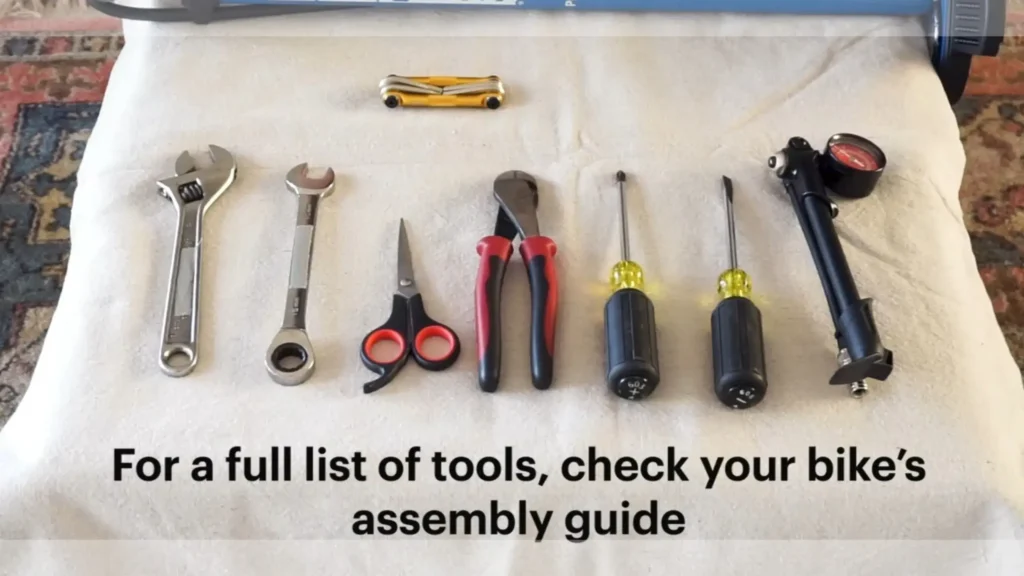
Gather Recommended Tools
While some bike manufacturers provide basic tools with the bike, you may need to supplement with additional tools. Common tools needed include:
- Allen wrenches/hex keys in a variety of metric sizes
- Torque wrench
- Bike grease or carbon assembly paste
- Adjustable wrench
- Rubber mallet
- Needle nose pliers
- Cable cutters
- Rulers/calipers
Refer to the bike manufacturer’s documentation for specific tools recommended for assembling that model. It is better to have any specialized tools on hand before beginning.
STEP- 2: Frame and Component Unboxing
Unpacking and Inspecting
When unboxing the frame and components, take care not to damage any parts. Use scissors or a utility knife to open the packaging. Remove tape, zip ties, or padding slowly, and do not cut through any cables or parts accidentally.

As each component is unpacked, thoroughly inspect it for any cracks, chips, or damage that may have occurred during shipping. Check the frame welds and joints closely. Spin the wheels to ensure they are straight and true. Inspect brake rotors and calipers for damage. Document any damage with photos when contacting the manufacturer.
Organizing Parts
As parts are removed from the packaging, lay them out in an organized manner. Group related components together, such as handlebars, stem, shifters, and brakes. Keep all small parts, bolts, and tools in separate containers to prevent loss.
Consult the instruction manual and parts checklist to ensure all components are present. Having an orderly workspace will make the subsequent assembly process much easier. Missing or damaged parts can be addressed with the manufacturer before starting the build.
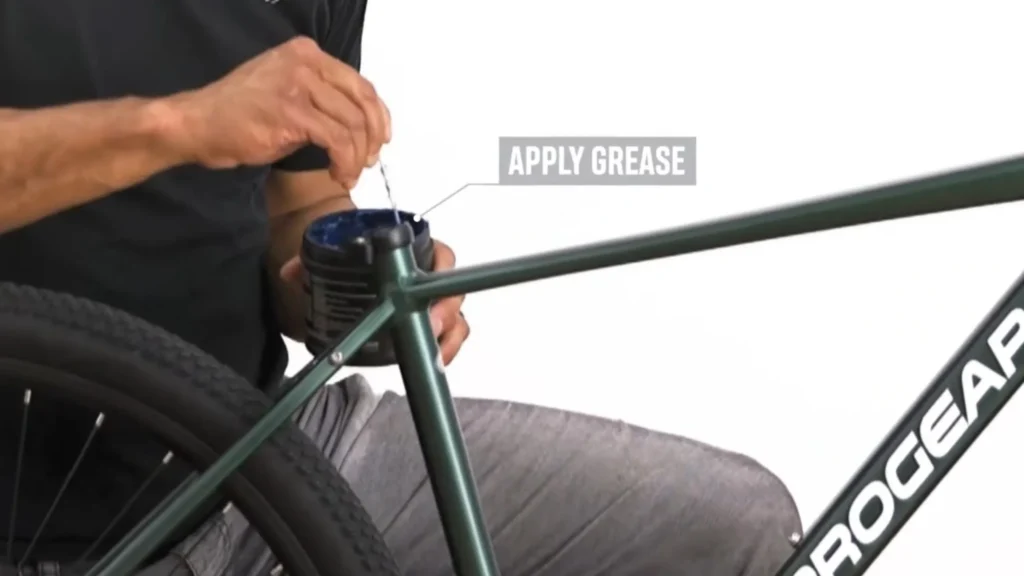
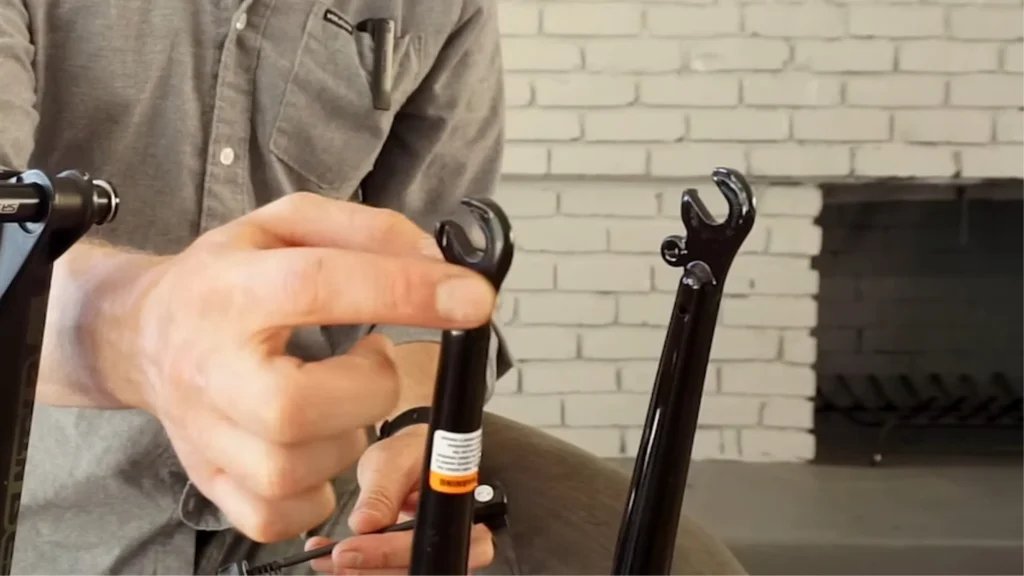
STEP- 3: Install Saddle and Seat Post
- Inspect seat post and saddle components. Apply carbon assembly paste if the post is carbon, and regular grease if alloy.
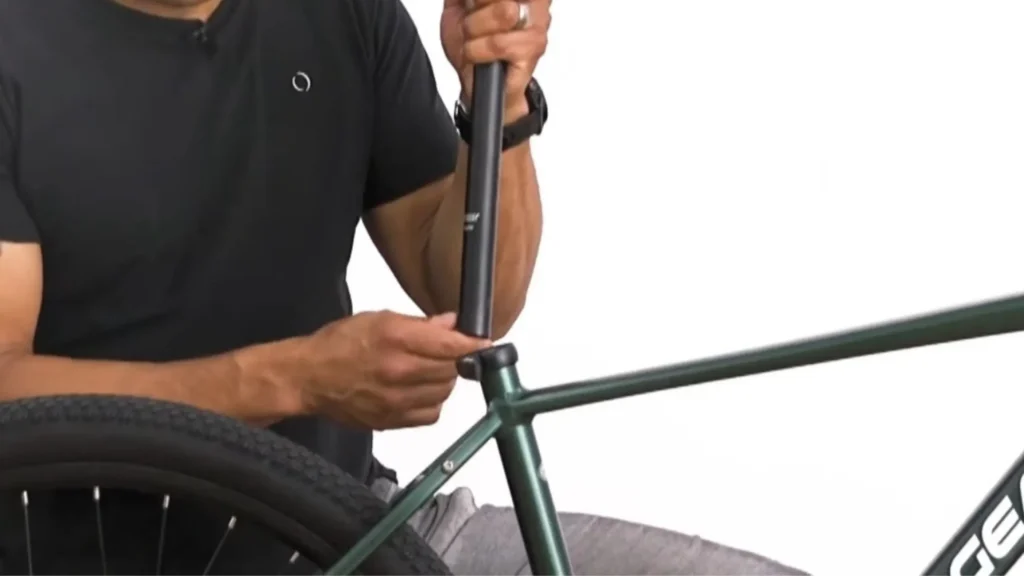
- Insert the seat post into the frame, being sure to meet the minimum insertion depth marked on the post.
- Tighten the seat post clamp to the recommended torque specs. Adjust saddle height and ensure it is straight.
STEP- 4: Cockpit Installation
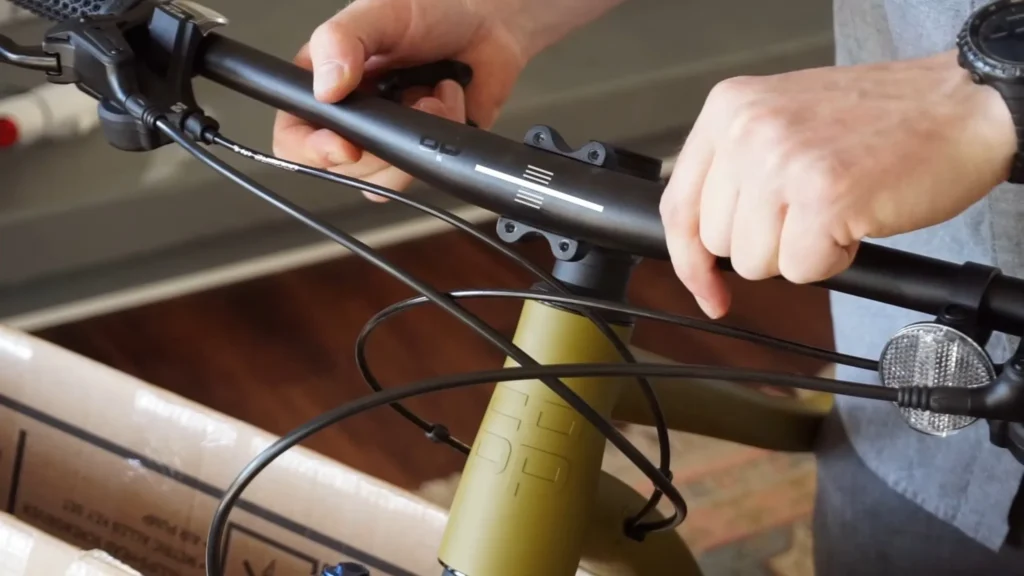
Handlebar and Stem
The handlebar and stem work together to provide steering control. Loosen the stem bolts and insert the handlebar into the stem, positioning it for comfort. Align the stem with the front wheel and tighten the stem bolts to the specified torque. Add spacers above or below the stem to adjust the handlebar height.
For threadless stems, tighten the top cap to preload the headset bearings before tightening the side bolts. Check for movement by rocking the fork back and forth.
Brake and Shifter Mounting
Mounting the brake levers and shifters in the proper position is important for safe control while riding. Position the brake levers at an angle that allows you to comfortably reach them without overextending your fingers. Generally, a 45-degree angle between the lever and handlebar is ideal.
Use the appropriate mounting bolt to clamp the levers securely per the torque specs. The shifter units should be positioned for easy access when riding.
Avoid over-tightening. Route the cables properly through any cable stops. Finally, check that each lever moves freely through its range of motion.
STEP- 5: Front Wheel Installation
NOTE: if you have received an already inflated tire from the box you can directly jump to the axle installation below.
Wheel Prep
Properly preparing the front wheel is important before installation. Apply rim tape evenly across the wheel rim surface to protect the inner tube. Inflate the tire to the recommended pressure, indicated on the tire sidewall. Give the wheel a spin to ensure the tire beads are properly seated on both sides of the rim.
Axle System Installation
There are two main types of bike axles to be aware of when installing the wheels:
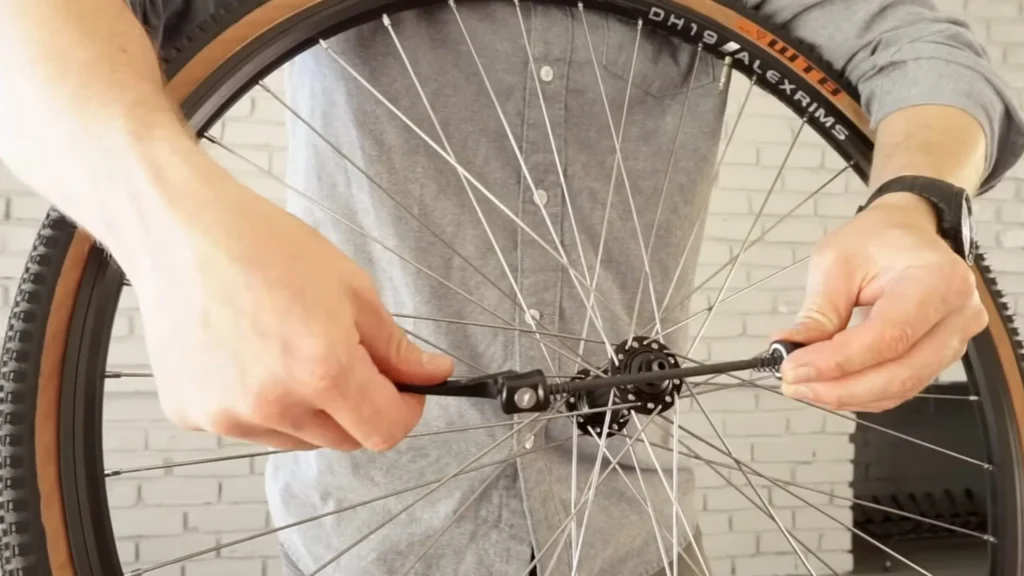
Quick Release Axle: This axle consists of a skeletal hub that inserts into the wheel dropouts. It uses a lever-operated retention mechanism to hold the wheel in place. When installing a quick-release wheel, Insert the axle through the hollow wheel hub and dropouts. Tighten the adjusting nut on the opposite end just enough so the lever can be closed with moderate force. Close the lever to lock the wheel in place.
Thru Axle: This axle goes fully through openings in the fork or frame and bolts into place on each side. Thru axles provide greater stiffness and security, especially for mountain bikes. Before installing a thru-axle, grease the axle threads. Insert the axle through the frame or fork openings and wheel hub. Use an Allen key to tighten the bolts on each end evenly to the proper torque specs.
For both wheel types, take care to insert the axle properly and center the wheel in the frame or fork before tightening fully. Spin the wheel to ensure smooth clearance between the brake pads or frame. The wheels should be secured but still allow free rotation when properly installed.
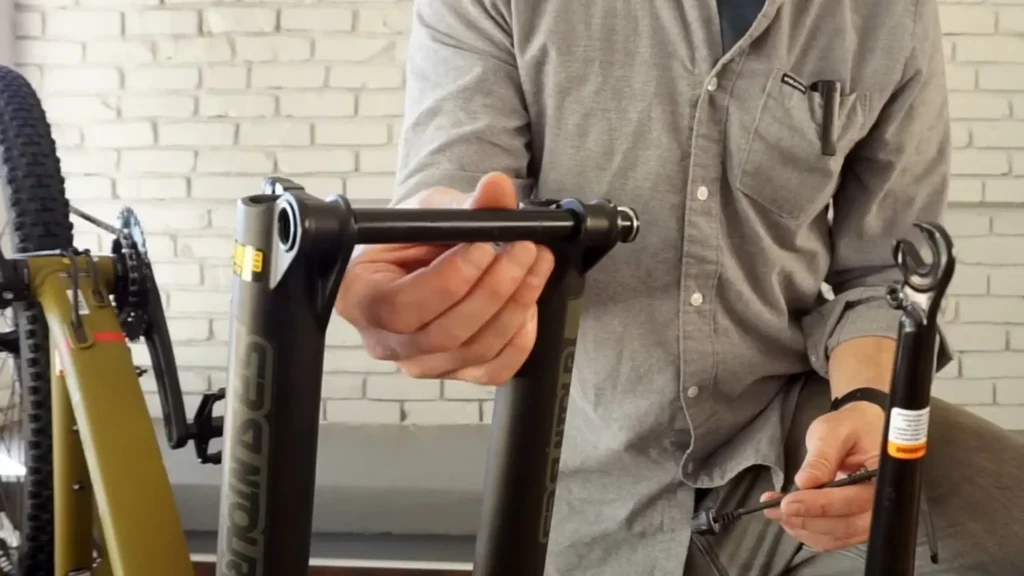
Mountain Bike Considerations
For mountain bikes, ensure the wider tire and rim clear the suspension fork properly when installed. The thru-axle must also be tightened sufficiently to handle more rugged riding conditions.
- The thru-axle must be tightened more than a quick release for rugged mountain biking. Aim for the higher end of the recommended torque range.
- Disc rotors may need spacers or adapters to fit properly between suspension fork legs. Refer to manufacturer instructions.
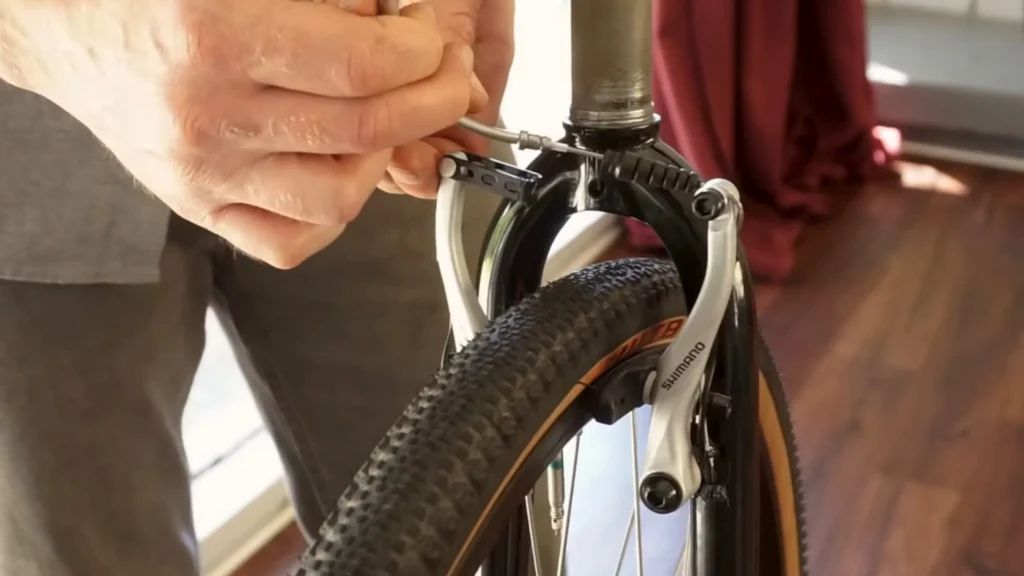
STEP- 6: Brake Installation
After the Front wheel installation, it’s time to install the brake system. That provides the stopping power.
Brake Installation.
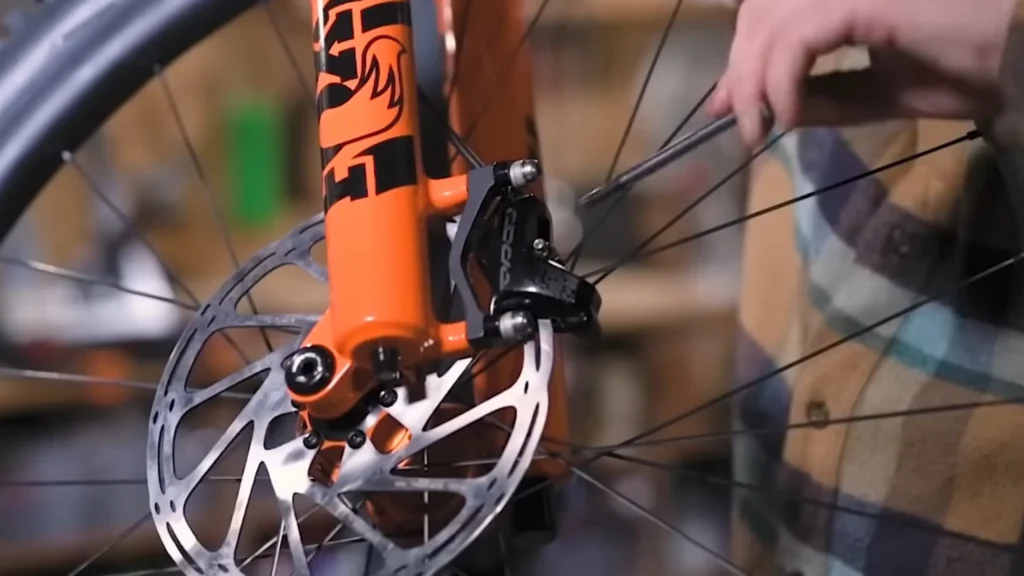
Properly mounting the brake levers and calipers is critical for control and braking performance. refer back to step 4 for proper brake lever adjustment tips.
For disc brakes, insert any necessary adapters and attach the caliper to the mounting points. Spin the wheel, checking for clearance issues or rubbing. Align the caliper as needed before tightening the mounting bolts to spec. Adjust the brake pad spacing from the rotor for proper engagement.
Ensure the brake lever pressure and modulation feel are tuned for proper braking control before riding.
For caliper brakes, position the caliper centered over the wheel rim. Use the mounting bolt to secure it to the frame or fork at the recommended torque. Spin the wheel and squeeze the lever to ensure proper smooth braking engagement.
troubleshooting tips:
If brake levers lack pressure, check hydraulic fluid levels or cable tension as needed. Adjust cable tension at the caliper or with barrel adjusters to restore lever pressure.
If shifts are inaccurate, check derailleur alignment and limit screw settings. Fine-tune the limit screws to broaden or narrow the gear range as needed for crisp shifting.
ALSO READ: What break you should choose for your new bike V brakes vs disc brakes Explained.
STEP- 7: Pedal Installation
Installing the pedals is one of the final steps in assembling the bike. Take care to attach the proper left and right pedal to avoid cross-threading.
Proper Pedal Orientation
To identify the pedal side if your pedal doesn’t have L and R markings. you can use pedal spindle thread angles.
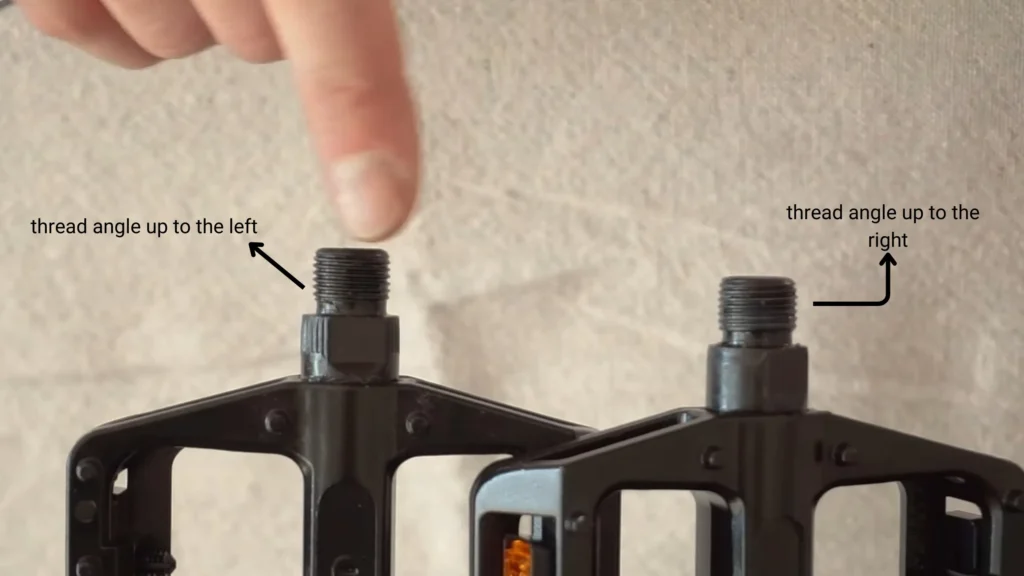
These Pedals are threaded differently on each side – the right pedal has threads moving up towards the right hand, and the left pedal has threads moving up towards the left hand. (as shown in the above image) Identify the correct pedal for each crank arm to avoid damage. Apply grease to the threads before tightening by hand and then with a wrench. Tighten fully but do not over-tighten.
Mountain Bike Considerations
Many mountain bikes use clipless pedals for efficiency and control. Install the desired clipless pedal system on the correct side. Adjust spring tension as needed. Use proper stiff-soled cycling shoes with cleats that match the pedal system. Practice engaging and disengaging the pedals before riding. Clipless pedals allow for power transfer on demanding mountain bike terrain.
ASSEMBLY VIDEO RECOMMENDATION BY CYCLIFY.IN
STEP- 8: Final Safety Checks
Before riding the newly assembled bike, it is crucial to do some final safety checks and a test ride to verify proper function.
Checking Torque Specs
Go over the entire bike and check the torque on every bolt using a properly calibrated torque wrench. Ensure all stem, wheel, brake, crankarm, and component mounting bolts are tightened to the correct torque spec as indicated by the manufacturer. Proper torque ensures parts are securely fastened without damage.
Test Ride
Take the bike for a short test spin in a flat, open area without hazards. Check that the shifting moves smoothly through all gears without hesitation. Test the brakes for proper modulation and secure stopping power. Listen and feel for any creaks or unusual movements that could indicate a loose component. Make any necessary minor adjustments.
With everything properly tightened and functioning flawlessly, you are now ready to thoroughly enjoy your newly assembled bike!
RELATED POSTS: you will find helpful-
1. cycling tips for beginners in India right way to start your cycling journey.
2. how to remove a bike chain without breaking it
3. top 10 bicycle maintenance hacks you can do at home.
FAQ on how to assemble a bike
How much does it cost to assemble a bike?
Bike shop assembly typically costs $60 – $150. Rates are about $60 – $75 per hour of labor. Basic assembly may take 1 hour, while complex builds with tuning can take 2-3 hours. Additional fees apply if you don’t supply parts. Quotes from multiple shops are recommended for complex builds. Know the shop’s rates and get an estimate beforehand.
How long does it take to assemble a bike?
The time required to assemble a bike can vary based on the bike type and components, but most basic builds should take 30-45 minutes for an experienced mechanic to work at a reasonable pace.
For DIY home assembly, allow yourself 1-2 hours. Complex builds with electronic shifting or suspension parts can also take longer.
Fantastic site A lot of helpful info here Im sending it to some buddies ans additionally sharing in delicious And naturally thanks on your sweat