
Cyclify India is reader-supported! We may receive an associate commission if you make a purchase through one of the Amazon Associate links on this page! Continue Reading…
Your bike’s parts will ultimately wear out if you ride it a much. A bike chain has to be replaced after a lot of kilometers because it will “stretch.”
It could be time to repair your bike chain if it’s rattling or if shifting gears is difficult. You may easily remove the chain from your bike and do any necessary repairs with the use of a specialized bike chain removal tool, also called a chain breaker tool.
If one is not available, you may still remove a bike chain with common household tools like a hammer or needle-nose pliers.
To put it mildly, replacing a bike chain may be a difficult process for newbies.
Thankfully, to remove a bike chain doesn’t have to be difficult or time-consuming. It’s something that just takes a few seconds to master with enough practice.
In this article, I’ll examine all the Necessary Things such as Easy methods for removing a chain , how to remove one without master link, among other things.
So, What are you Waiting for? Let’s Dive Right into it.
Table of Contents
How to Remove a Bike Chain Without Breaking It
Step 1: Gather your Equipment
According to REI, you may have a variety of equipment on hand to make bike chain repair easier, such as a chain wear tool, master link pliers, replacement pin, and chain tool.
- Using a chain wear tool, you can determine when it’s time to get a new chain.
- A master link connects two ends of a chain. To fix a broken chain, think about purchasing new pins as well.
- A chain tool can help you break your chain by taking out an old pin or putting in a new one.
- Using master link pliers, you can separate and rejoin the master link.
Master-Link Pliers
The purpose of master-link pliers is to reach between bike chain links. Even though certain master links may be disconnected by hand, master-link pliers make this process much easier.
It is not necessary to have master-link pliers if your chain is constructed of normal links unless you intend to upgrade to a different kind of chain.
Do you not know if you own a master-link? In essence, a master link is a single link in the chain with a unique appearance. Either it has a clip on it or it seems larger. While they are on most motorcycles, some are not.
Chain Tool
Any serious biker should carry the appropriate chain tools as regular equipment.
A chain with standard links cannot be unfastened without one. When cutting a new chain to the proper length for your bicycle utilizing a master-link chain, a chain cutter is still necessary.
New Bicycle Chain
Keep in mind that bike chains are speed-specific, which means that your chain’s width must coincide with your cassette’s width.
Use of a 9-speed cassette requires the use of a 9-speed chain; similarly, a 10-speed cassette must be used with a 10-speed chain.
Step 2: Check the Previous Chain’s Length
I’m assuming you plan to install a fresh chain at some time. And for that, The first thing you should do is measure how long the old chain is.
If you take the time to make sure the chain you are replacing is the right length, you may use the old chain’s length as a reference to cut the new one down to size.
First, install the largest rear sprocket and the largest chainring, which is the front set of gears. The chain should be long enough and the sprockets on the rear derailleur should be slightly offset from one another to enable this gear.
Switch to your smallest rear sprocket & chainring.
There should be very little gap between the cassette as well as the derailleur arm at these speeds, and the chain should be tight.
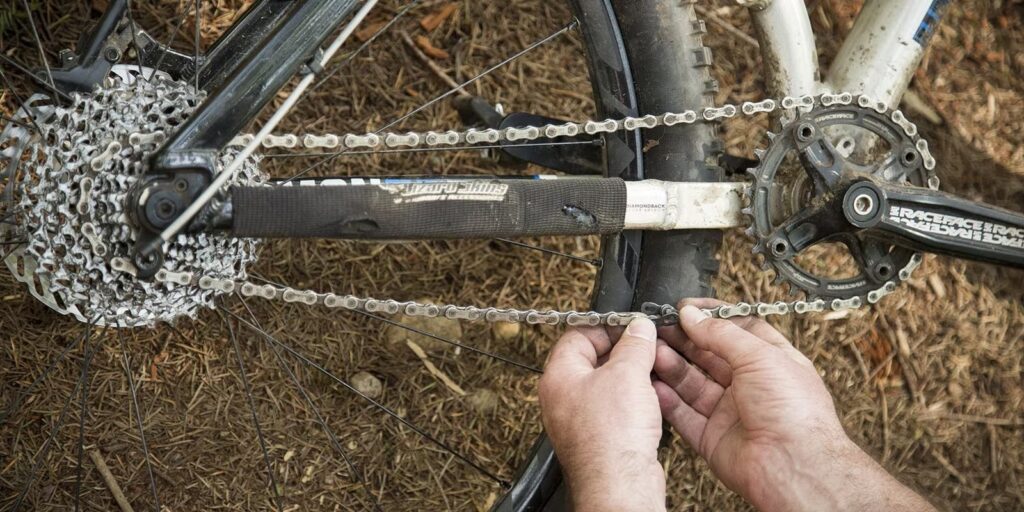
Step 3: Attach the Link and Chain Tool
Your chain tool should include two prongs that fit into corresponding holes in a bike chain link in addition to the small metal pin.
Tighten the link after inserting it between the two prongs. The prongs need to fit into the holes on either side of the connection.
You may expect rollers, pins, outer plates, and inner plates to make up your bike chain. Using a chain tool to remove the pin from the rollers is necessary in order to dismantle a chain.
If you place your tool somewhere other than the pins, you run the danger of breaking your chain.
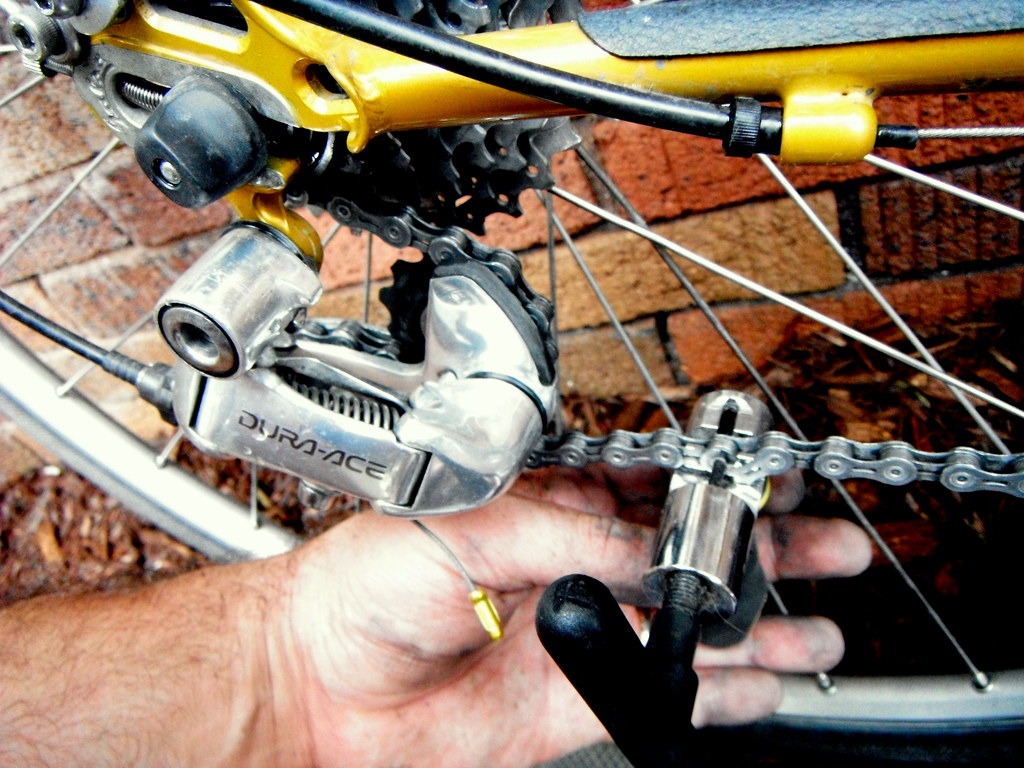
Step 4: Turn the handle of the chain tool clockwise to insert the pin.
The pin needs to sit precisely in the center of the link in order to fasten the chain correctly.
Continue rotating the knob in a clockwise manner if such is the case. Check to make sure the tool hasn’t come loose from the pin, even if you have some trouble.
how you crank the handle, watch how the rivet—the pin in the middle of the chain link—is driven out on the other side of the link. There is no way to put the rivet back in if it comes loose from the link while you are spinning the handle.
Turn the handle of the tool counterclockwise to extract the pin from the chain link. You have to take the pin out of the connector entirely.
You’re done if you can remove your bike chain from the chain tool without turning the handle any further.
Handy Advice
As you might be able to insert it back into the link, be careful that your pin doesn’t come out entirely.
If you pull your pin completely out of your chain, you can shorten it by one link, to the next one without harm. This might, however, make it more difficult for you to shift directions.
One other choice is to visit a bike store and inquire about purchasing a new chain or new chain pin.
Step 5: Find the Master Link
The master link will usually have a distinct look from the other links in the chain.
Look for links that are unique from the others, such as links with one side painted a different color or links with pins (the circular metal pins in the middle of the links) that aren’t the same as the others. You may utilize an arrow icon on your master link.
Step 6: Cut the Link
Apply pressure to the master link by use of pliers.
A master link plier fits into the notches of a bicycle chain link thanks to its unique form.
Placing the pliers’ jaws in the notches on each side of the master link is the correct method. With the pliers’ handles facing each other, insert the master link.
Squeezing the handle of the pliers will close the jaws, allowing the master link to be pulled together after it has been placed.
The master link might break if you release the pliers. Pull apart the pliers at the handles in order to release the master link.
The master link needs to be broken. (Refer)
Step 7: Remove the bike’s chain
Proceed with caution when removing the chain from the bike’s sprockets. It should be easy to delete the master link now that it has been unhooked (ideally!).
To repair the chain, rejoin the rivets at the ends and use the pliers to firmly fasten the master link.
There is an excellent video on YouTube that demonstrates how to remove a bicycle chain if you’re the type of person who learns best by watching visual aids.
Chain Removal Without A Master Link
If your bike’s chain is missing a master link, disassembling it will be more challenging. Apologies! It is still possible to accomplish, nevertheless, even without specific tools.
Just a few everyday objects, like these, will do.
- A hammer
- An instrument for punching
- Supports (two wrenches, wood blocks, etc.)
Here’s a three-step method for disassembling a chain without the master link using the tools indicated above:
- Arrange the chain so that it crosses the space between two stationary spots.
- Punch through a rivet in the chain.
- Using a hammer, tap the rivet and the link to remove them from the chain.
RELATED POST: We also created a simple guide on how to assemble a bike at home with 8 easy steps do check it out.
How to Free a Stuck Bike Chain
Unless the chain has already dropped to the ground like a dead snake, you can easily remove a broken chain from the derailleur. Somewhere between the chainstay / the chainrings, it can be clumped & stuck.
If that’s the case, don’t attempt to push it.
Focus on the part that is securely connected and work your way slowly and carefully to release it.
In order to avoid damaging anything, proceed very carefully if you must use tools to remove it.
Taking the wheel off the bike will help the gears work more smoothly if you’re experiencing problems removing it. If that fails, you should be able to remove the cassette with a cassette tool, at which point the chain should fall free.
How Often to Replace Your Bike Chain
The frequency of chain disassembly and inspection is something that many cyclists, particularly beginners, are ignorant of.
To ascertain the state of your chain, look for “chain stretch” or “chain wear”. With typical tear and damage, the chain’s pitch will eventually lengthen.
When the bushings gradually wear down together with the chain pins, it results in the worst kind of chain wear.
Bushings expand with usage, causing pins to wear loose & become less secure. The pitch for the initial link in a chain is typically 0.5 inches (12.7 millimeters). More than one percent has been added to the pitch of a worn chain.
Despite its seemingly little nature, this has a significant effect on how smoothly your bicycle rides gonna be.
Why should you be on the lookout for Chain Wear?
When it’s time to replace your chain, make sure to inspect how worn it is.
Over time, all chains undergo stretching. That is the current state of affairs. This article on how bicycle chains stretch (and the things you should do about it) has all the information you need to understand this phenomenon.
The chain loses its quality and becomes less efficient as it ages (and expands).
A heavily worn chain will also be weaker and more prone to break while you’re riding.
Your greatest worry with chain wear should be the possibility of a severe financial loss if it is not addressed quickly. (Believe me!)
There is a 0.5-inch gap between the links on the new chain and the cog. Pitch increases allow the chain to roll up on the tooth more, which reduces the amount of surface area in contact with the cog and increases wear.
In the event that the chain wears excessively, it will start to skip over the gear. Nobody likes to come across this when riding their bike. (Reference)
How to Determine Chain Wear?
A tape measure, a ruler, or a chain-checking instrument can all be used to gauge a chain’s wear.
Making Use of a Ruler
The first step in using a ruler to detect chain wear is to ensure that a brand-new chain measures exactly 12 inches across 12 links (from the center of the pin to the center of the pin).
A worn chain is indicated by 1% link elongation, according to the majority of industry experts.
However, you should detach and reattach your chain before it reaches this point. You ought to get a new chain if the length has grown by more than 12 & 1/16 inches or 0.5%.
You should not account for the presence of a master link, power lock, or fast link when determining the length of your bike chain.
This short table will help you understand how to respond to the metrics that you obtain when determining the chain stretch:
How to Maintain the Chain on Your Bike
The chain can become soiled and grubby when riding a bike on a road or path.
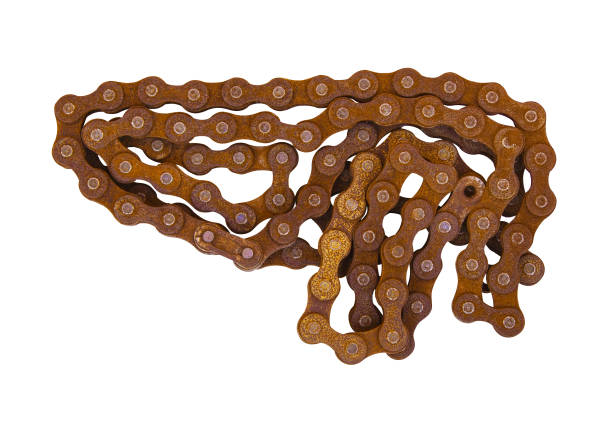
If the chain dries out or rusts because of the climate, it may be challenging to shift gears.
Below are some pointers to assist you in correctly maintaining your bike chain so that you may steer clear of expensive repairs or uncomfortable riding in the future!
- Riding a bike safely and smoothly requires keeping your chain clean and well-lubricated. To keep your bike from rusting, lubricate the chain and clean it thoroughly on a regular basis.
- Nevertheless, use caution when lubricating your bike’s chain excessively, as this may potentially be harmful by increasing its slickness and encouraging dirt as well as abrasive particles to become lodged in the moving components.
- Because it can withstand being rinsed, wet lubrication is ideal for riders who ride in the rain regularly, but dry lubricant is better suited for drier climates because dirt sticks to it less firmly.
- Turn your bike so that the pedals are flat on the ground to clean the chain. A cloth can be used to clean the filthy chain. You might need to use a degreaser made specifically for bicycles if your chain is really filthy. Select a chain lubricant designed especially for bicycle chains, work it into each link well, and then remove any leftovers by wiping them off.
Read More: How to Remove Rust from your Bicycle Chain?
FAQ on How to Remove a Bike Chain Without Breaking it at Home
How can I tell when my bike chain needs to be replaced?
When your chain elongates and expands by 0.5–1%, or 12 1/16 inches over 12 links, replace it. A worn chain is noisy, difficult to move smoothly, and brittle.
What equipment is required to take off a bike chain?
Some helpful tools include a chain tool, master link pliers, and perhaps a chain wear checker. If necessary, you can also use common household objects like pliers and a hammer.
How may a bike chain get trapped and be removed?
Never push a jammed chain free. Find the area where it is still attached and proceed with caution to release it. It could be loosened by removing the wheel or cassette.
Can I use an old bike chain again?
Replacing a worn-out chain is the best course of action. Sprockets and gears will soon wear out if a stretched chain is reused.
How frequently should my chain be lubricated?
Every 100–200 miles, apply a small coating of lubrication. Before applying lubricant, clean the chain and remove any excess by wiping it off. Excessive lubricant invites dirt.
Which lubricant works best for bike chains?
In damp situations, wet lubes perform admirably. In drier regions, dry lubes draw less dirt. Use a lubricant designed especially for bike chains rather than regular lubrication.
Conclusion on How to Remove a Bicycle Chain Without Breaking it at Home
As an enthusiastic rider, you are aware of the significance of maintaining your bicycle. Regretfully, the chain is among the most crucial parts of your bike and also one of the hardest to take off.
Thankfully, it doesn’t have to be a challenging undertaking.
You can quickly, safely, and without damaging your bike chain by following a few easy steps. Knowing when to take off and replace a bicycle chain can help you prevent chain wear and ensure a smooth ride.
0 Comments