
Cyclify India is reader-supported! We may receive an associate commission if you purchase through one of the Amazon Associate links on this page! Continue Reading…
One of the most basic mechanical operations of your bike is shifting gears, along with its brakes. Although gearing up and shifting effectively may seem simple, even seasoned riders may improve their shifting skills. When you have the right gears, you can ride faster, over longer distances, and with greater comfort.
Envision yourself riding a bike down a picturesque path while you feel the bike gain momentum and gain energy.
You go for the bike’s gears automatically when you approach a high incline because you know which one to shift into to handle climbing a hill. However, you may be wondering how to shift gears on a bicycle if you’re a newbie.
In addition to the technical aspects of shifting gears on a bicycle, this article will cover the reasons behind it, when to do it, as well as how to completely comprehend its workings.
I completely realized the fundamentals of efficient gear changing, which enhances cycling performance. One of the most crucial skills while riding a bike is knowing how to shift gears on a bicycle.
We’ll go through the Bicycle parts and mechanics of gear shifting on a bike in this post, along with the reasons why mastering it will improve your riding.
Table of Contents
Learning The Basics
You must learn how to use your bike’s speed selections now that you are aware of their availability. Every piece of gear has a specific purpose. For example, left-hand shifters use the front gears, and right-hand shifters use the rear gears.
1. Left-hand shifters

Typically, you are in charge of your front gears when you use the left-hand shifter. The derailleur will automatically shift the chain laterally to catch up with the front gear as soon as you engage the left-hand shifters. Your front gear exhibits a significant shift in the bike’s gear ratio when this occurs.
2. Right-hand shifters
The rear gear is controlled by right-hand shifters in the meantime. The rear derailleur will rapidly shift sideways to catch up with the back gear as soon as you push the right-hand shifters. Unlike when utilizing the left-hand shifters, the gear will only show a minor shift over the gear ratio.
3. Downshifting or Gearing Down
Changing to low gear on the equipment is known as gearing down or downshifting. Downshifting is a common tactic used by cyclists in preparation for climbs. You can cycle smoothly even when going up a hill by downshifting. It simplifies and reduces the power needed for pedaling. Gearing down involves switching to such as a larger rear gear or a smaller front gear.
4. Upshifting or Gearing Up
Conversely, you’ll need to upshift or gear up if you want to travel more quickly. You must bike more vigorously throughout this procedure and shift into the highest cycling gear.
5. Speed Bike
You most likely boasted to your peers as a Kid about how many “speeds” your bike possessed. The amount of gears on your bike is what you were referring to, whether it was 7, 18, 21-speed, etc. This figure might be found by multiplying the number of chain rings (front gears) on your bike by the number of cogs in your cassette (rear gears). You have a 21-speed bike, for instance, if it’s got two chain rings and 11 gears in the cassette. But in the current bicycle market, higher-end adult bikes are rarely mentioned in this manner since, well, more doesn’t always equal better. Here’s more about that!
6. One, Two, or Three-by
Your bike’s number of chainrings, or front gears, dictates whether your drivetrain, or system of gears, is called a “one-by,” “two-by,” or “three-by.” In the bicycle business, the current tendency is to use fewer chain rings to achieve the same range of gears. More cogs and frequently more teeth on the biggest cog in the cassette result in a bigger cassette (rear gears). How come? Because a bike with fewer chain rings is usually lighter, more maneuverable, and easier to ride. It explains why high-end road bikes frequently have two-by drivetrains while mountain bikes frequently have one-by drivetrains.
Read More: Best Gear Cycle Brands in India of 2024.
What Is Gear and Parts Involved In Gear Shifting?
Knowing the ins and outs of how bicycle gears work, what precisely is going on with the bike’s mechanical is beneficial because shifting gears is your direct engagement with it.
We must examine all the associated parts and their interactions in order to really grasp this.
Read More: Best Gear Cycles under 15000 in India.
Chainrings
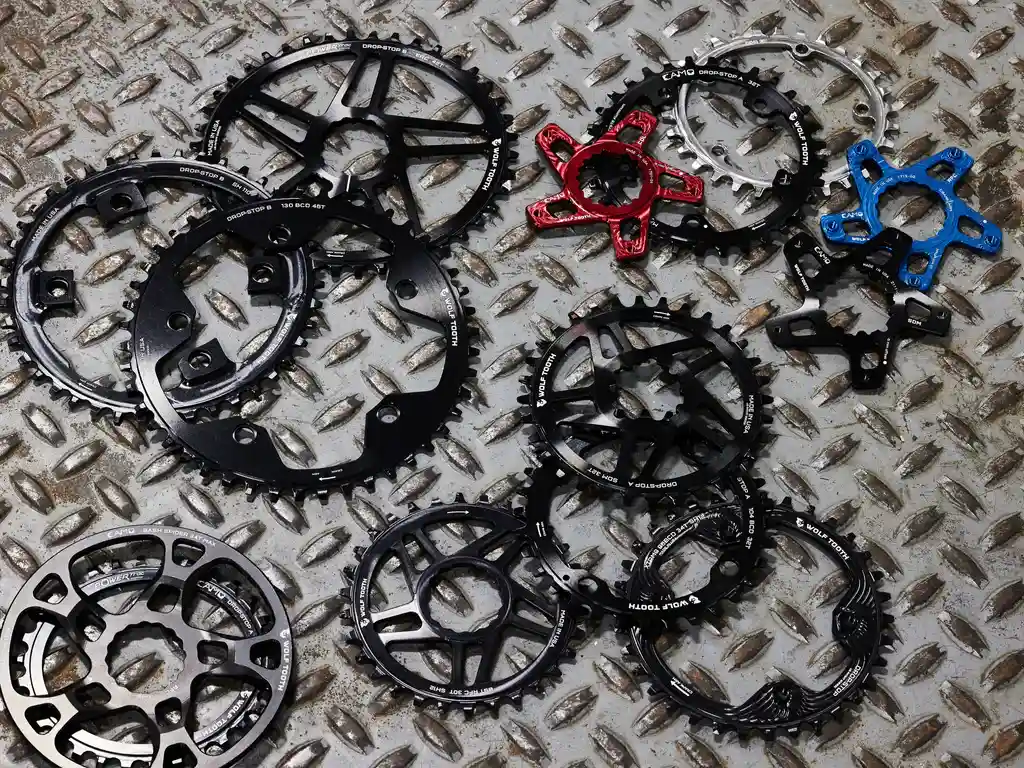
Cogs in the front gear are called chainrings. The crank arms, which connect them directly to the pedals, are collectively known as the “crankset” (or “chainset”).
The gear ratio will increase with a bigger chainring, making pedaling more difficult. Many bikes feature multiple chainrings that you may switch between to adjust the gear ratio.
A drivetrain or “1x” crankset (pronounced “one-by”) is a crankset that has just one chainring.
You can call a crankset with two chainrings a “double” or “2x” crankset. The terms “triple” or “3x” refer to cranksets that have three chainrings.
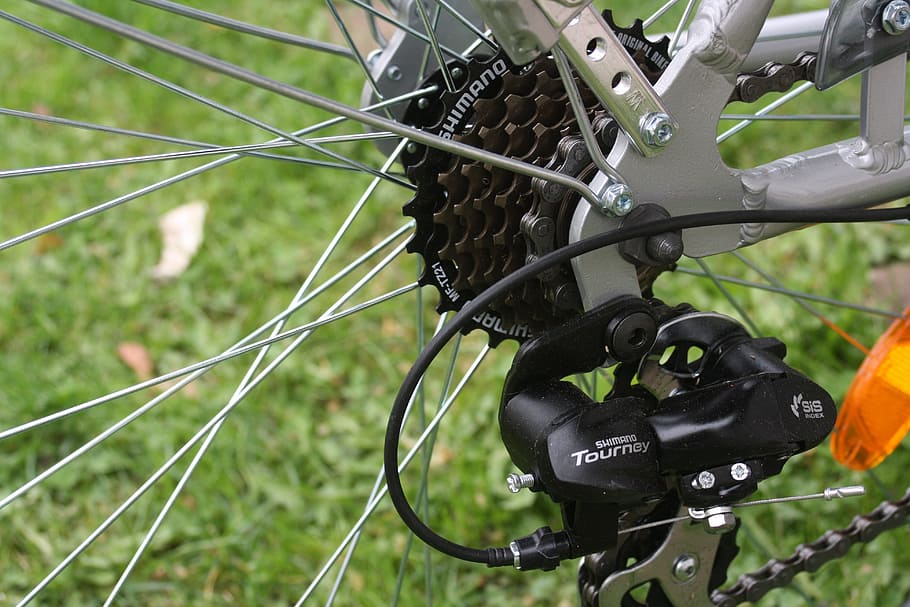
Cassette

Sprocket clusters linked to the back wheel are called cassettes. Larger sprockets will offer a lower gear ratio, which will make pedaling easier, while smaller sprockets will provide a higher gear ratio, which will make pedaling harder.
The number of sprockets on a cassette can vary from five to twelve, allowing the rider to choose the gear ratio.
Chain
When you apply pedal pressure, the back wheel rotates because of the chain that links the chainrings to the cassette.
Chains can be changed between cassette sprockets or chainrings to select different gears.
Read More:
Derailleurs
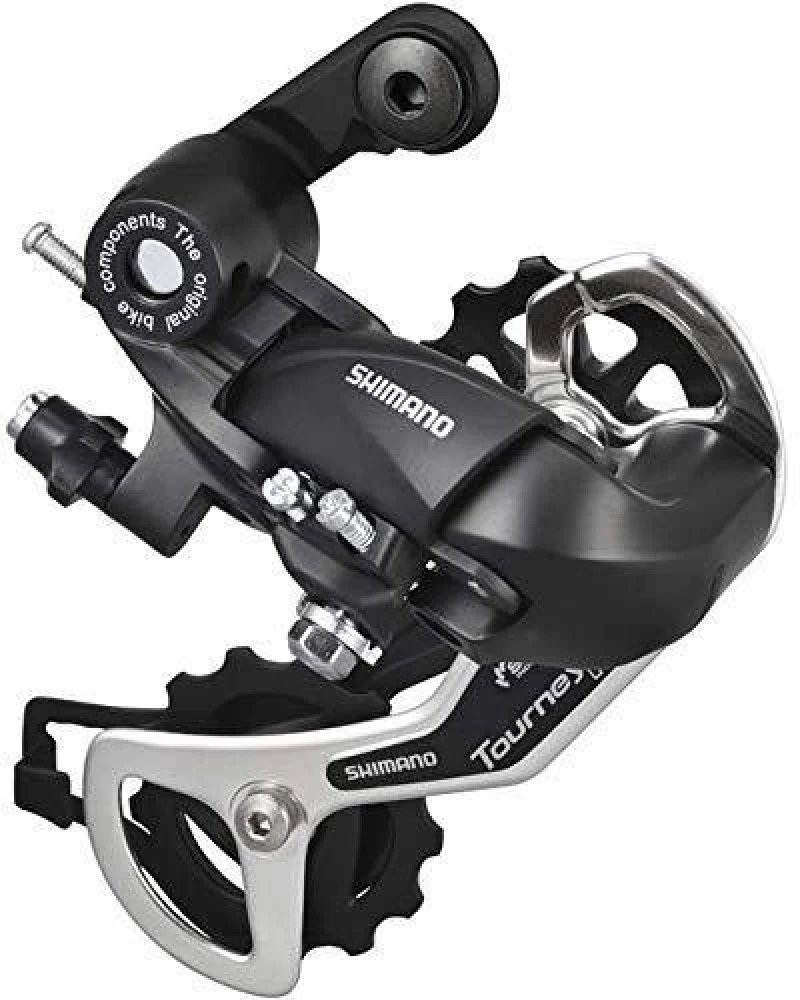
The parts that actually shift the chain from one cog to another are called derailleurs. Stated differently, they are the component that genuinely changes the gear.
The chain is moved between various chainrings by the front derailleur and between various cassette sprockets by the rear derailleur.
A front derailleur is not necessary for bikes with a single chainring as there are no other chainrings for the chain to be transferred between.
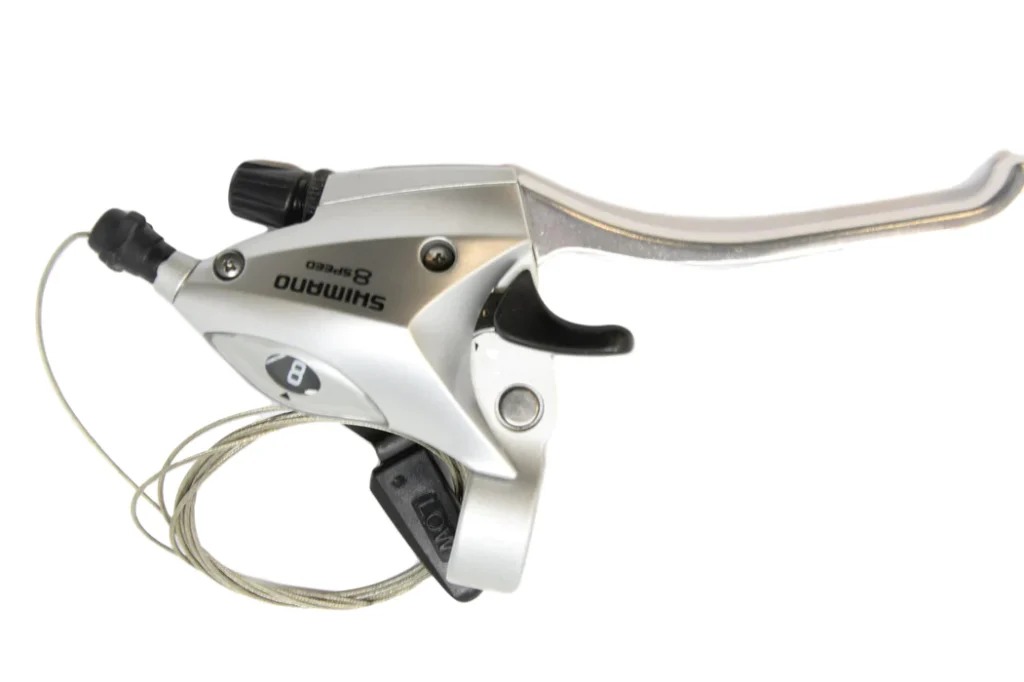
Shifters
The parts that the cyclist uses to regulate the derailleurs and change gears are called shifters. These were once a pair of levers that were found on the down tube of the bike, but on most modern motorcycles, they are now commonly found on the handlebars.
The majority of contemporary designs employ indexed shifting, which uses buttons or paddles to click the derailleur between pre-defined locations for each gear. Older designs used friction-shifting, where the position of the lever mechanically influences the position of the derailleur.
Shifters come in a variety of shapes and sizes. Some examples are the road bike “drifters” seen in the upper photo, as well as trigger-style, twist-grip, and old-fashioned friction shifters.
Why do I need to shift Gears?
To shift gears on a bike, one must adjust the derailleurs. These derailleurs then adjust the chain to fit between various “cogs” in the drivetrain that is, separate metal rings with teeth on which the chain rests.
The term “chainrings” refers to the front set of cogs on a bicycle that is connected to the pedals through the crank arms, while the term “cassette” refers to the rear set of cogs that are coupled to the rear wheel. Each individual gear in the cassette is referred to as a “sprocket”.
The easiest way to describe a “gear” in this context is as the chain’s location over a certain chainring & cassette sprocket when it is in a single configuration.
Consequently, a bike with two chainrings (front cogs) and eleven cassette sprockets (rear cogs) has a total of 22 gears.
The number of teeth in the front chainring divided by the number of teeth in the rear sprocket is known as the gear ratio, and it gives each gear its distinct identity.
The gear ratio determines how simple or complex it is to turn the pedals, which in turn determines how far you can go with each pedal revolution.
Low gear ratios make climbing easier
Although it is easier to turn the pedals with low gear ratios, you won’t go very far with each rotation.
For instance, you would have a gear ratio of 1 if you were using a gear with the chain on a 34-tooth chainring and a 34-tooth cassette sprocket at the back.
That implies the back wheel will turn one full revolution for every pedal turn.
It’s simple to climb steep hills with this gear, which is regarded as extremely low.
High Gear Ratios Make Flats and Descents Quick
High gear ratios, on the other hand, make it harder to twist the pedals, but every turn will propel you forward significantly.
This ratio, for instance, is 4.82 in a gear with an 11-tooth sprocket at the back & a 53-tooth chainring at the front. By this calculation, the back wheel will turn 4.82 times for every turn of the pedals.
It will be quite challenging to turn in this high gear on a climb, but it will let you to go quickly on flat terrain or descents.
In conclusion, gears are essential for optimizing your pedaling efficiency!
It makes sense to “downshift” while approaching a hill; we’ll talk about this later in the post.
To make pedaling easier, you must lessen the gear ratio by shifting gears.
You won’t need to exert as much force through the pedals to maintain a high enough cadence as cycling is now easier.
This implies that you won’t tire out your legs as quickly climbing the slope. Since this is the end result, we must change course in this situation!
However, you may upshift as you approach a downhill so that your gear ratio rises and the wheel rotates more with each pedal stroke.
Although it can seem like a basic, easy task, learning to choose gears and change efficiently is a talent that can constantly be improved.
The mechanical goal of gear changing is to maximize the amount of energy that is transferred from your muscles to the output of your bike while you ride. You are effectively choosing the amount of effort exerted for each pedal stroke when you choose a gear.
Regardless of the discipline you choose, choosing the right gear and shifting will increase your comfort and endurance in addition to your speed, control, and momentum.
Read More: Difference Between Gear or Gearless Cycle?
How to shift the Gears on a Bike
The question now is how to shift now that you know what are gears & How gears works, How do you shift Gears? Your bike’s shifters may appear slightly different depending on the kind of bike you ride. When riding a road bike, or a bike with drop handlebars, the brake levers also serve as the gear shifters. Pushing the lever sideways until you hear a click activates the shifters. The majority of hybrid and mountain bikes with flat bars allow you to change gears using set paddles that you push with your thumb. Certain bikes are equipped with “grip shifters,” which are dials that are positioned inside the area where your hands are placed. You shift gears on these systems by turning the dial forward and backward.
The wire that connects to your shifters is housed in a safe casing. Your chain travels upward and downward on the cassette or chainrings as a result of the cable tightening and relaxing as you click through the gears. This action exerts varying degrees of strain on the derailleur. We shall describe each lever’s function below:
Left-hand Shifter = Crankset
You may shift into higher gears and alter your pedal effort by using the left-hand shifter, which is often used to shift the chain on the front chainrings.
Because the gaps between cog sizes are wider when shifting on the chainrings, the effect of shifting will be much more noticeable than when changing on the cassette.
Consider it this way: you may fine-tune the gear ratio for the terrain by using the cassette sprockets after shifting between the chainrings to approximate it.
Change the chain to the smallest front chainring, which is very helpful when climbing hills, to make cycling much simpler.
Move the chain to the biggest front chainring, which helps with speed control, for example, if you want to make cycling more difficult.
Right-hand Shifter = Cassette
However, the right-hand shifter is often in charge of shifting the chain on the rear cassette, allowing for more precise changes to select the ideal gear.
Climbing will become simpler to pedal as the chain is progressively changed to the larger gears at the back.
Changing to the smaller rear gears gradually increases pedaling effort, which is advantageous while descending.
In the end, the ideal strategy is to go on rides and explore until you build muscle memory and know which shifters to use on certain terrains and scenarios.
Big lever*: The chain may be moved into larger rings by pulling on the larger of the two shifter levers. Big=big, therefore. Pedaling will be EASIER if you shift into the larger rings with your right hand. It will be harder if you shift into the bigger gears with your LEFT hand.
Little lever*: The chain may be moved into smaller rings by pulling on the smaller of the two shifter levers. Thus, it is small. The pedaling will get more difficult as you shift into smaller rings with your right hand. Pedaling will be easier if you shift into the lower gears with your LEFT hand.
*Lack a large or little lever? It’s possible that your SRAM road drivetrain makes use of the “double tap” mechanism. This indicates that the main brake lever is tucked under a smaller lever that can only be moved in a single direction. The chain may be moved into a bigger, easier gear in the back (right hand) and a larger, tougher gear in the front (left hand) with a lengthy push (two clicks). The chain may be moved into a smaller, tougher gear in the back (right hand) & a smaller, easier gear in the front (left hand) with a quick push (one click).
Grip shift could also be seen. This implies that to change the gears, you will have a dial that you can spin forward and backward. By turning the dial forward, the chain may be placed in a smaller, more difficult gear for the right hand and a smaller, more manageable gear for the left. To shift the chain into a bigger, easier rear gear (right hand) & a larger, harder front gear (left hand), twist the dial back.
When to shift gears on your bicycle?
Now that we’re aware of gears, how they work, and How to shift gears for a smooth riding experience, The question arises when to actually shift a gear.
1. Beginning or Ending
Some people find it difficult to start their bicycle with just a few pedals. It is the moment when your equipment accelerates to a specific speed from a standstill position. Thus, it’s imperative that you start off in a respectably low gear before shifting up to increase your riding pace.
Use the low gear once again if a traffic signal requires you to halt. It will be simpler to begin bicycling once the light turns green in this method.
2. Increasing Speed
You must start in low gear when cycling in a competition or to increase your pace. As you go, you must progressively move up your gear. You may increase acceleration in this method without overtaxing your leg muscles.
Using a medium gear is best for highways and flat areas.
3. Going Upward
Lowering your gears is preferable if you want to climb a hill steadily and deliberately. You may have greater control over your bike by shifting into lower gears, but you will be riding at a slower pace. When ascending a hill in a low gear, you don’t have to exert much effort.
4. Riding downhill
The greatest technique to move downhill or on level terrain is to shift or gear up. Shifting to higher gears for a quicker speed setting will make flat terrain simpler to navigate. That also implies that you need to pedal harder and quicker to pump up your bike.
Read More: Gear vs Gearless Bicycle: Which is best for Weight Loss?
Things to Avoid While Gear Shifting to avoid Damage
If you utilize gears wrong, it might cause harm to your bike. Your bike chain’s unsettling cracking noise is a sign that you are not in the correct gear. Should this continue, you might end up damaging many parts of your bicycle.
Here are some things you should be aware of in order to stop this from happening:
1. Cross Chaining

When you cross chain, your bike chain is on the other gears of the cassette or chain ring. A bike chain should always be linear or straight. A chain wears out quickly because of the tension it experiences when it is positioned on the opposing cogs.
2. Avoid load-bearing shift
When you shift gears, you are applying excessive force to your pedals, which is known as load bearing. It generally happens when you ride uphill or at speed. To avoid load bearing, it is crucial to shift gears while applying moderate pedal power.
Loud cracks and sluggish or delayed shifting will result from this, and the chain, cassette, or even the chain ring itself may get damaged. The chipped tooth on one of the gears might potentially cause the chain to snap, which would be far worse.
Practical and Efficient Techniques for Shifting
Now, the most crucial thing to keep in mind when riding any kind of bike is that there is never the perfect gear! CHANGE!
Too frequently, we witness riders spinning out in a gear too easy for the downhill they are riding or putting too much force into their pedals as they climb a steep hill in the huge chain ring. A steady cadence, or the pace at which your pedals complete a full revolution, is what you should aim for when cycling! It has to shift or boost power output in order to do it. Most people don’t have an infinite amount of power unless they are super human. We recommend shifting frequently to ride more efficiently.
Pro Tip: To maintain a constant cadence, start shifting into lighter gears with your right hand early on. Recall that you should use your right hand for minor terrain adjustments. You’ll probably need to use your left hand to operate the front derailleur if you see that your pedaling pace is significantly decreasing.
This will make the gearing much simpler for the upcoming steep climb. Nevertheless, you may discover that your front derailleur refuses to cooperate if you are already pushing hard on the pedals as you ascend the slope!
The vehicle will probably shift and make a grinding noise, but nothing will happen, and you will probably halt in the midst of the slope.
You should apply a bit more force to your pedal stroke just prior to shifting and then lessen it as you change, rather of grinding those gears. Your chain will slip out of the large ring and into the smaller one more easily if your derailleur is under less pressure!
Tips to Keep in Mind When Operating a Geared Cycle:
Avoid shifting too quickly: It might be tempting to move straight up to a higher gear when traveling downhill, but doing so could result in the chain entirely jumping off the gears. Before going on to the next gear, check sure the chain has engaged with the previous one by shifting gradually.
Left is for big changes, right is for fine tuning The shifter on the left is more convenient to operate when you are expecting a climb. You may quickly fine-tune using the appropriate shifter after you are in an easier gear.
Consider The Terrain: In general, you want to change gears before attacking any particular terrain. For instance, change gears right before you go up a hill rather than halfway through, when you start to feel the burn. If you overcomplicate the climb, it might cause extra leg strain and wear down the bike’s drivetrain due to increased stress.
Consider the climb: Preparing for the ascent requires planning ahead and changing gears before beginning the ascent.
Pedal While Shifting: When changing gears, don’t forget to spin the pedals. If you are not actively pedaling your bike, it will not shift. I know it seems simple, but when I first started riding, I would coast to the end of a downhill section, slow down for a corner, and then mess up the turn because the bike would seize and lurch when I tried to peddle again!
Cross-chain: Avoid sticking on one chainring and simply shifting gears on a bicycle at the back by avoiding cross-chain.
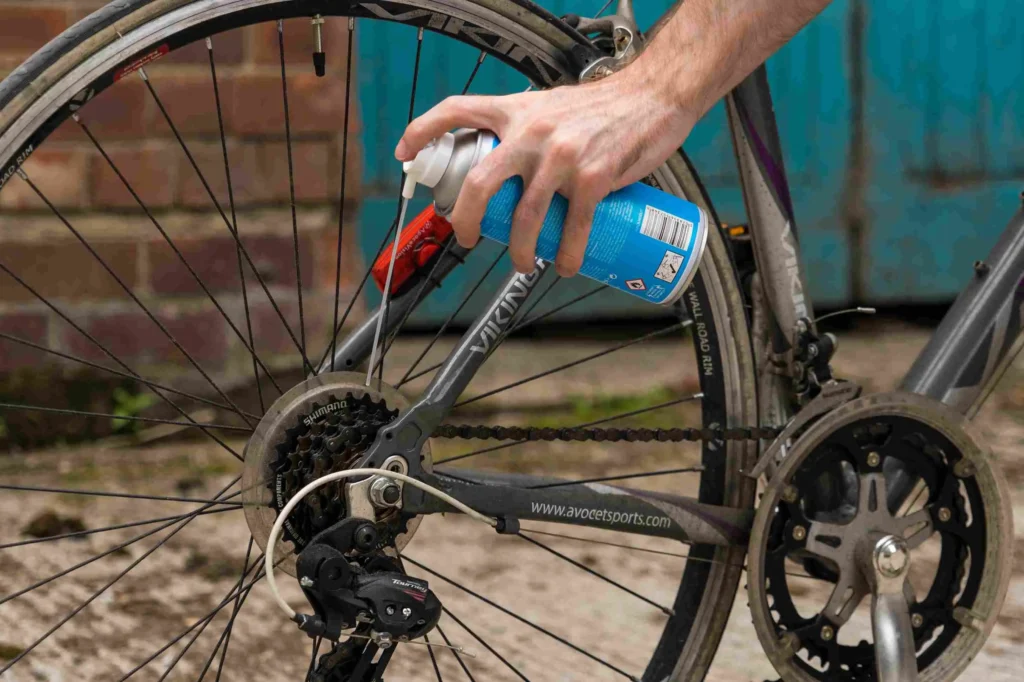
Maintenance: It goes without saying to check that the cables connecting the derailleurs and shifters are correctly tensioned, and ensure sure the rest of the drivetrain is greased and clean. Now that you understand how to shift gears on a bicycle, you can ride more effectively and efficiently!
ALSO READ: Microshift vs Shimano groupset: Your riding style matters for Selecting the right one.
Conclusion on How to Shift Gears on a Bicycle
Bicycle equipment has a direct bearing on how well your equipment performs. If you know the fundamentals of shifting gears on a bicycle, you can ride the road more effortlessly. Fortunately, we have included all the essential details below to assist rookies like you in learning how to swap gears on a bike for beginners.
With the correct information, you may practice shifting gears on a bicycle in a variety of terrains and complete a few practice runs.
0 Comments